Add Facebook Like Buttons In Blogger

How To Add Facebook Like Button In Blogger?

Follow below steps....
1.open facebook url in first steps shown in fig.
2.Paste your facebook page url which you want to create fb like button.
3.Click on get Code...
add fb like button in blogger id

4.Goto your blogger id.
5.Select layout option.
6.Select Add a Gadget button in shown in fig.
add gadgets in blogger

7.Select HTMP/Javascript option shown in below fig.
select html/javascript option in blogger

8.Paste you iframe Facebook code like shown in fig.
add facebook like button in blogger
html javascript option

9.Save it and you have done...

Add Facebook Comments System In Blogger

How To Get Facebook App ID?

This tutorial divided in some steps you need just follow these steps giving below.

  • First Go to Facebook Developers Page
  • Give you app name as your site title name etc and click on continue button as showing below

  • Now fill security check captcha   and then continue
  • Now you go on a new page here you can see your app id and we need it in next steps


How To Add Facebook Comments In Blogger?

  • First go to Blogger > Template > Edit HTML
  • Now search for <html  and just after it give a space and paste the below code
xmlns:og='http://ogp.me/ns#
  • Now search for <body> tag and just below it paste the following code
<div id="fb-root"></div>
<script>
window.fbAsyncInit = function() {
FB.init({
appId : 'YOUR_APP_ID',
status : true, // check login status
cookie : true, // enable cookies to allow the server to access the session
xfbml : true // parse XFBML
});
};
(function() {
var e = document.createElement('script');
e.src = document.location.protocol + '//connect.facebook.net/en_US/all.js';
e.async = true;
document.getElementById('fb-root').appendChild(e);
}());
</script>
  • Replace YOUR_APP_ID  with your Facebook Application ID 
  • Now search for </head> and just above it paste the below code
<meta property="fb:app_id" content="YOUR_APP_ID" />
  • Replace YOUR_APP_ID with your Facebook Application ID
  • Now search for  <b:includable id='comment-form' var='post'>  just after it paste the below code
<b:if
cond='data:blog.pageType == "item"'>
    <div
    style='padding:20px 0px 5px 0px; margin:0px 0px 0px 0px;'>
        <script
        src='http://connect.facebook.net/en_US/all.js#xfbml=1'
        />
        <div>
            <fb:comments
            colorscheme='light'
            expr:href='data:post.url'
            expr:title='data:post.title'
            expr:xid='data:post.id'
            width='550'
            />
        </div>
                </div>
                </b:if>
  • Now click on Save Template button and you are done !
  • Now you have successfully added Facebook Comments System in Blogger for result check preview of your site
If you like our tutorial then please share with your friends and give me your feedback via comments Take Care ! - See more at: http://www.googleagra.com

Add Beautiful Popular Posts Widget In Blogger

Beautiful Popular posts Widget For BloggerPopular posts widget is also in blogger widgets   as default but to give it a new look you need to   make some changes in CSS coding. Today we   are providing a beautiful popular widget for   blogger which have a great look and have an    awesome hover effect. Popular posts widget is in   your blogger right side and also make a attention   for a visitor to add this widget you can make a   good impression on your visitor so when visitors   show these posts and if like on of them then the   visitor surely click  on it and this visitor become   your loyal reader. So for this cause we providing   Popular Posts widget for Blogger it also make a professional look for your template. - See more at: http://www.googleagra.com

How To Add Popular Posts Widget In Blogger?

To add This widget in Blogger you need to follow these simple steps:-
  • First Go To Blogger > Layout
  • Click on Add A Gadget
  • Now Click on Popular Posts widget and make the follow changes as showing in picture
  • popular

  • Make the same changes as shown above in picture
  • And Click on Save Button
  • Now the second part is add the CSS code for this
  • Go To Blogger > Template
  • Click on Edit HTML

popular 2
  • Click on Black Arrow to expand the coding
  • Now search </b:skin> using ctrl+f
  • Above </b:skin> paste the following code
/*--- MBW Popular Posts --- */
.popular-posts ul{padding-left:0px;}
.popular-posts ul li {background: #FFF url(http://1.bp.blogspot.com/_7wsQzULWIwo/S
modosCuJCI/AAAAAAAABh4/ZSXbVW9Qpa8/s400/261.gif) no-repeat scroll 5px 10px;
list-style-type: none;
margin:0 0 5px 0px;
padding:5px 5px 5px 20px !important;
border: 1px solid #ddd;
border-radius:10px;
-moz-border-radius:10px;
-webkit-border-radius:10px;
}
.popular-posts ul li:hover {
border:1px solid #6BB5FF;
}
.popular-posts ul li a:hover {
text-decoration:none;
}
  • Now click on Save Template and you are done !
If you need any kind of help then please leave a comment Take Care ! - See more at: http://www.mybloggerwidgets.com/2013/10/add-beautiful-popular-posts-widget-in.html#sthash.Fv1tNyJY.dpuf

Add Do You Like This Story Widget Below Every Post

Welcome again to all Friends as i already provided Social Media Sharing widget and also Flipper Sharing widget for Blogger, For many requests today i am showing you how to add Do You Like This Story Widget for Blogger. - See more at: http://www.googleagra.com/

How To Add Do You Like This Story Widget In Blogger?

To install this widget in blogger you need to following these simple steps:-

  • Go to Blogger > Template > Edit HTML
  • Search for <data:post.body/>  using CTRL+F
  • Now paste the following code below it
<b:if cond='data:blog.pageType == &quot;item&quot;'> 
<style> 
form.emailform{ 
margin:20px 0 0; 
display:block; 
clear:both; 

.mbwtext{ 
background:url(http://3.bp.blogspot.com/-SoB4RN7Bchk/TZ1ouay9q0I/AAAAAAAAAlE/dkyZEzF2
HIw/s28/w2b-mail.png) no-repeat scroll 4px center
transparent; 
padding:7px 15px 7px 35px; 
color:#666; 
font-weight:bold; 
text-decoration:none; 
border:1px solid #D3D3D3; 
-moz-border-radius: 4px; 
-webkit-border-radius: 4px; 
border-radius: 4px; 
-moz-box-shadow: 1px 1px 2px #CCC inset; 
-webkit-box-shadow: 1px 1px 2px #CCC inset; 
box-shadow: 1px 1px 2px #CCC inset; 

.mbwbutton{ 
color:#666; 
font-weight:bold; 
text-decoration:none; 
padding:6px 15px; 
border:1px solid #D3D3D3; 
cursor: pointer; 
-moz-border-radius: 4px; 
-webkit-border-radius: 4px; 
-goog-ms-border-radius: 4px; 
border-radius: 4px; 
background: #fbfbfb; 
background: -moz-linear-gradient(top, #fbfbfb 0%, #f4f4f4 100%); 
background: -webkit-gradient(linear, left top, left bottom, color-stop(0%,#fbfbfb), color-stop(100%,#f4f4f4)); 
background: -webkit-linear-gradient(top, #fbfbfb 0%,#f4f4f4 100%); 
background: -o-linear-gradient(top, #fbfbfb 
0%,#f4f4f4 100%); 
background: -ms-linear-gradient(top, #fbfbfb 0%,
#f4f4f4 100%); 
filter: progid:DXImageTransform.Microsoft.gradient( startColorstr=&#39;#FBFBFB&#39;, endColorstr=&#39;#F4F4F4&#39;,GradientType=0 ); 
background: linear-gradient(top, #fbfbfb 0%,#f4f4f4 100%); 

#doulike-outer { 
-moz-border-radius: 10px 10px 10px 10px; 
-webkit-border-radius: 10px 10px 10px 10px; 
-goog-ms-border-radius: 10px 10px 10px 10px; 
border-radius: 10px; 
background: none repeat scroll 0 0 transparent; 
border: 1px solid #D3D3D3; 
padding: 8px; 
-moz-transition: all 0.3s ease-out; 
-o-transition: all 0.3s ease-out; 
-webkit-transition: all 0.3s ease-out; 
-ms-transition: all 0.3s ease-out; 
transition: all 0.3s ease-out; 
width:480px; 

#doulike-outer:hover{ 
background: none repeat scroll 0 0 #FFF; 
-moz-box-shadow: 1px 1px 2px #CCC inset; 
-webkit-box-shadow: 1px 1px 2px #CCC inset; 
box-shadow: 1px 1px 2px #CCC inset; 

#doulike-outer td{ 
padding:3px 0; 

</style> 
<div id='doulike-outer'> 
<div id='doulike'> 
<table width='100%'> 
<tbody> 
<span style='font-style: italic; font-size: 30px; font-family: arial,sans-serif, verdana;  color:#FF683F;'>Do you Like this story..?</span> 
<tr> 
<td> 
<div id='fb-root'/><script src='http://connect.facebook.net/en_US/all.js#xfbml=1'/><fb:like font='' href='' layout='button_count' send='true' show_faces='false' width='300'/> 
</td> 
</tr> 
<tr> 
<td align='left'> <p style='color:#666; font-style:italic; margin:0px 0px 5px 0px; '>Get Free Email Updates Daily!</p> 
<form action='http://feedburner.google.com/fb/a/mailverify' class='emailform' method='post' onsubmit='window.open(&apos;http://feedburner.google.com/fb/a/mailverify?uri=MyBloggerWidgets&apos;, &apos;popupwindow&apos;, &apos;scrollbars=yes,width=550,height=520&apos;);return true' style='margin: 0pt;' target='popupwindow'> 
<input name='uri' type='hidden' value='MyBloggerWidgets'/> 
<input name='loc' type='hidden' value='en_US'/> 
<input class='mbwtext' name='email' onblur='if (this.value == &quot;&quot;) {this.value = &quot;Enter your email...&quot;;}' onfocus='if (this.value == &quot;Enter your email...&quot;) {this.value = &quot;&quot;}' type='text' value='Enter your email...'/> 
<input alt='' class='mbwbutton' title='' type='submit' value='Submit'/> 
</form> 
</td> 
<td><p style='color:#666; font-style:italic; margin:0px 0px 5px 0px;  '>Follow us!</p> 
<a href='http://feeds.feedburner.com/googleagra' rel='nofollow' target='_blank' title='Suscribe to RSS Feed'><img src='http://4.bp.blogspot.com/-GMZCDc-rTEo/Ul1e3h5B_ZI/AAAAAAAAA7U/fUAGzf
FsbUE/s1600/flagrss.png
'/></a> 
<a href='https://twitter.com/uttamsingh121' rel='nofollow' target='_blank' title='Follow us on Twitter'><img src='http://4.bp.blogspot.com/-xuXeIIyW_7k/Ul1e3kYOYBI/AAAAAAAAA7Y/df8L7
ZihYTI/s1600/flagtwitter.png
'/></a> 
<a href='https://www.facebook.com/googleagra' rel='nofollow' target='_blank' title='Follow us on Facebook'><img src='http://2.bp.blogspot.com/-yy7ZUovcX4w/Ul1e3lIvgoI/AAAAAAAAA7k/zdgg0RkaQ
sk/s1600/flagfb.png
'/></a> 
</td> 
</tr> 
</tbody></table></div></div> 
</b:if>

  • Replace Googleagra  with your Feed title
  • Replace Blue color link with your Feedburner link
  • Replace Orange color link with your Twitter link
  • Replace Maroon color link with your Facebook link
  • Now save your template and you are done !
After saving the template preview your site and you can see the changes
Note:-  This widget only shows below your posts not on homepage and give your feedback via comments Take Care ! 

Facebook Popup (Like Box Widget) for blogger

Here's a fantastic way to increase facebook likes for your blog or website.  Add this enticing widget to your site and a facebook like box will pop up with the lightbox effect when a user visits your page.  The facebook widget will show up on your page about 30 seconds after the page loads.  This is a surefire way to dramatically increase your likes.

Add Widget to Your Site

Add the following code anywhere in the body section of your template. Or simply click the "add to blogger" button for blogspot blogs. 

How to Customize

  • Search for href=http://www.facebook.com/googleagra and replace it with your site's facebook page URL.
  • Change the 30 Second Time Delay by searching for the code below and changing the number 30000 to a greater or lesser number.
    1 second = 1000.  10 seconds = 10000. 60 seconds = 60000.

  • By default, the like box widget only shows up the first time the user visits your page.  If you would like the facebook box to popup evertime the page loads, then remove this line of code:

  • Display facebook widget when user visits your homepage: You can do this by surrounding the widget code with these conditional tags below. Go to Template Edit HTML. Now search for the </body> tag. Place the facebook popup widget right above this body tag.  Make sure to include the conditional tags below.

Custom Color Picker

Installation

  • Refer to customColorPicker.js and customColorPicker.css in the head section of your page
    <link href="colorpicker/customColorPicker.css" rel="stylesheet" type="text/css" />
    <script src="colorpicker/customColorPicker.js" type="text/javascript"></script>
  • Add a color picker to your page by the following HTML markup:
    <span class="colorpicker"> <span class="bgbox"></span> <span class="hexbox"></span> <span class="clear"></span> <span class="colorbox"> <b class="selected" style="background:#A9BAD4" title="Light Blue"></b> <b style="background:#A1A4B3" title="Stone Blue"></b> <b style="background:#A49381" title="Sand"></b> <b style="background:#626878" title="Charcoal"></b> <b style="background:#2E436E" title="Navy Blue"></b> </span> </span>
    Note:
    • All color cells are defined as <b> tag contained in the span.colorbox. Each color is defined by its background style.
    • Elements span.bgbox and span.hexbox are optional. span.bgbox indicates the selected color by its background color, and span.hexbox indicates the selected color by the color cell's title.
    • Set class="selected" to the color cell that should be the default selected color.
    • You can add multiple Custom Color Pickers on the same page.

Slider with Tooltip

HTML Content
This slide shows that HTML/Text can also be used as thumbnails
Demos: 1234
Hovering over each thumbnail in the slider will launch a tooltip window that can display any HTML content.
The source code of this demo is the demo4.html that you can download from the jquery Slider page.

Steps to integrate Menucool Tooltip widget with the Thumbnail Slider

  1. Set up a Thumbnail Slider as instructed in page jquery Slider
  2. Add the Menucool Tooltip JavaScript and CSS links into the head section of the page
    <link href="themes/4/Tooltip.css" rel="stylesheet" type="text/css" /> <script src="themes/4/Tooltip.js" type="text/javascript"></script>
  3. Add onmouseover event to each thumbnail for showing the tooltip:
    <div id="mcts1"> <img src="images/thumbnail-slider-1.jpg" onmouseover="tooltip.pop(this, 'This is the first slide')" /> <img src="images/thumbnail-slider-2.jpg" onmouseover="tooltip.pop(this, '#tip2')" /> <img src="images/thumbnail-slider-3.jpg" onmouseover="tooltip.pop(this, '#tip3')" /> ... ... ... </div>
    // You just need to pass in the element ID starting with "#", tooltip.pop(this, '#tip2'). // The element of "#tip?" contains the tooltip HTML content on the page. You can view the source code of demo4.html for details.
There you have it!
It is recommended to use the source code of demo4.html that you can download from page jQuery Slider for a quick setup.
Using this demo requires two licenses: one for the slider and another for the tooltip.
($20 + $20 = $40).

Pure CSS Image Slider for Blogspot/blogger

Here I came up with a stylish and hot image slider for blogger that is just using pure CSS3. NoJavascript or jQuery is used. So this slider is more easy to customize for newbies, just need a basic HTML and little good CSS3 knowledge. No server side coding is used here, so all is on your hand. This cycle style slider is created by smashingmagazine. Take a look on their page for more about it.
I created a bogarized version from theirs, it is now just need to follow few easy steps to installing this slider on blogspot blog.

Lets follow the simple 4 steps to add this "CSS3 image slider to Blogger blog"

1. Go to Blogger Dashboard > Layout >  
2. Add a HTML/Javascript Gadget
3. Copy the code below and paste on it.

<style type="text/css" media="screen">
.container {
    margin: 0 auto;
    overflow: hidden;
    width: 700px;
}
#content-slider {
    height: 335px;
    width: 100%;
}
#slider {
    background: none repeat scroll 0 0 #000000;
    border: 5px solid #FFFFFF;
    box-shadow: 1px 1px 5px rgba(0, 0, 0, 0.7);
    height: 320px;
    margin: 10px auto;
    overflow: visible;
    position: relative;
    width: 680px;
}
#mask {
    height: 320px;
    overflow: hidden;
}
#slider ul {
 margin:0;
 padding:0;
 position:relative;
}
#slider li {
 width:680px;
 height:320px;
 position:absolute;
 top:-325px;
 list-style:none;
}

#slider li.firstanimation {
 -moz-animation:cycle 25s linear infinite; 
 -webkit-animation:cycle 25s linear infinite;  
}
#slider li.secondanimation {
 -moz-animation:cycletwo 25s linear infinite;
 -webkit-animation:cycletwo 25s linear infinite;  
}
#slider li.thirdanimation {
 -moz-animation:cyclethree 25s linear infinite;
 -webkit-animation:cyclethree 25s linear infinite;  
}
#slider li.fourthanimation {
 -moz-animation:cyclefour 25s linear infinite;
 -webkit-animation:cyclefour 25s linear infinite;  
}
#slider li.fifthanimation {
 -moz-animation:cyclefive 25s linear infinite;
 -webkit-animation:cyclefive 25s linear infinite;  
}

#slider .tooltip {
 background:rgba(0,0,0,0.7);
 width:300px;
 height:60px;
 position:relative;
 bottom:75px;
 left:-320px;
 -moz-transition:all 0.3s ease-in-out;
 -webkit-transition:all 0.3s ease-in-out;  
}
#slider .tooltip h1 {
 color:#fff;
 font-size:24px;
 font-weight:300;
 line-height:60px;
 padding:0 0 0 20px;
}
#slider li#first:hover .tooltip, 
#slider li#second:hover .tooltip, 
#slider li#third:hover .tooltip, 
#slider li#fourth:hover .tooltip, 
#slider li#fifth:hover .tooltip {
 left:0px;
}

/* PROGRESS BAR */
.progress-bar { 
 position:relative;
 top:-5px;
 width:680px; 
 height:5px;
 background:#000;
 -moz-animation:fullexpand 25s ease-out infinite;
 -webkit-animation:fullexpand 25s ease-out infinite;
}
/* ANIMATION */
@-moz-keyframes cycle {
 0%  { top:0px; }
 4%  { top:0px; } 
 16% { top:0px; opacity:1; z-index:0; } 
 20% { top:325px; opacity:0; z-index:0; } 
 21% { top:-325px; opacity:0; z-index:-1; }
 92% { top:-325px; opacity:0; z-index:0; }
 96% { top:-325px; opacity:0; }
 100%{ top:0px; opacity:1; }
 
}
@-moz-keyframes cycletwo {
 0%  { top:-325px; opacity:0; }
 16% { top:-325px; opacity:0; }
 20% { top:0px; opacity:1; }
 24% { top:0px; opacity:1; } 
 36% { top:0px; opacity:1; z-index:0; } 
 40% { top:325px; opacity:0; z-index:0; }
 41% { top:-325px; opacity:0; z-index:-1; } 
 100%{ top:-325px; opacity:0; z-index:-1; }
}
@-moz-keyframes cyclethree {
 0%  { top:-325px; opacity:0; }
 36% { top:-325px; opacity:0; }
 40% { top:0px; opacity:1; }
 44% { top:0px; opacity:1; } 
 56% { top:0px; opacity:1; } 
 60% { top:325px; opacity:0; z-index:0; }
 61% { top:-325px; opacity:0; z-index:-1; } 
 100%{ top:-325px; opacity:0; z-index:-1; }
}
@-moz-keyframes cyclefour {
 0%  { top:-325px; opacity:0; }
 56% { top:-325px; opacity:0; }
 60% { top:0px; opacity:1; }
 64% { top:0px; opacity:1; }
 76% { top:0px; opacity:1; z-index:0; }
 80% { top:325px; opacity:0; z-index:0; }
 81% { top:-325px; opacity:0; z-index:-1; }
 100%{ top:-325px; opacity:0; z-index:-1; }
}
@-moz-keyframes cyclefive {
 0%  { top:-325px; opacity:0; }
 76% { top:-325px; opacity:0; }
 80% { top:0px; opacity:1; }
 84% { top:0px; opacity:1; }
 96% { top:0px; opacity:1; z-index:0; }
 100%{ top:325px; opacity:0; z-index:0; }
}

@-webkit-keyframes cycle {
 0%  { top:0px; }
 4%  { top:0px; }
 16% { top:0px; opacity:1; z-index:0; } 
 20% { top:325px; opacity:0; z-index:0; }
 21% { top:-325px; opacity:0; z-index:-1; }
 50% { top:-325px; opacity:0; z-index:-1; }
 92% { top:-325px; opacity:0; z-index:0; }
 96% { top:-325px; opacity:0; }
 100%{ top:0px; opacity:1; }
 
}
@-webkit-keyframes cycletwo {
 0%  { top:-325px; opacity:0; }
 16% { top:-325px; opacity:0; }
 20% { top:0px; opacity:1; }
 24% { top:0px; opacity:1; } 
 36% { top:0px; opacity:1; z-index:0; } 
 40% { top:325px; opacity:0; z-index:0; }
 41% { top:-325px; opacity:0; z-index:-1; }  
 100%{ top:-325px; opacity:0; z-index:-1; }
}
@-webkit-keyframes cyclethree {
 0%  { top:-325px; opacity:0; }
 36% { top:-325px; opacity:0; }
 40% { top:0px; opacity:1; }
 44% { top:0px; opacity:1; } 
 56% { top:0px; opacity:1; z-index:0; } 
 60% { top:325px; opacity:0; z-index:0; } 
 61% { top:-325px; opacity:0; z-index:-1; }
 100%{ top:-325px; opacity:0; z-index:-1; }
}
@-webkit-keyframes cyclefour {
 0%  { top:-325px; opacity:0; }
 56% { top:-325px; opacity:0; }
 60% { top:0px; opacity:1; }
 64% { top:0px; opacity:1; }
 76% { top:0px; opacity:1; z-index:0; }
 80% { top:325px; opacity:0; z-index:0; }
 81% { top:-325px; opacity:0; z-index:-1; }
 100%{ top:-325px; opacity:0; z-index:-1; }
}
@-webkit-keyframes cyclefive {
 0%  { top:-325px; opacity:0; }
 76% { top:-325px; opacity:0; }
 80% { top:0px; opacity:1; }
 84% { top:0px; opacity:1; }
 96% { top:0px; opacity:1; z-index:0; }
 100%{ top:325px; opacity:0; z-index:0; }
}

/* ANIMATION BAR */
@-moz-keyframes fullexpand {
    0%, 20%, 40%, 60%, 80%, 100% { width:0%; opacity:0; }
    4%, 24%, 44%, 64%, 84% { width:0%; opacity:0.3; }
   16%, 36%, 56%, 76%, 96% { width:100%; opacity:0.7; }
   17%, 37%, 57%, 77%, 97% { width:100%; opacity:0.3; }
   18%, 38%, 58%, 78%, 98% { width:100%; opacity:0; } 
}
@-webkit-keyframes fullexpand {
    0%, 20%, 40%, 60%, 80%, 100% { width:0%; opacity:0; }
    4%, 24%, 44%, 64%, 84% { width:0%; opacity:0.3; }
   16%, 36%, 56%, 76%, 96% { width:100%; opacity:0.7; }
   17%, 37%, 57%, 77%, 97% { width:100%; opacity:0.3; }
   18%, 38%, 58%, 78%, 98% { width:100%; opacity:0; } 
}
</style>

<div class="container">
 <div id="content-slider">
     <div id="slider">
         <div id="mask">
            <ul>
            <li id="first" class="firstanimation">
            <a href="http://dimpost.com">
            <img src="http://project.dimpost.com/image-slider/images/img_1.jpg" alt="Cougar"/>
            </a>
            <div class="tooltip">
            <h1>Cougar</h1>
            </div>
            </li>

            <li id="second" class="secondanimation">
            <a href="#">
            <img src="http://project.dimpost.com/image-slider/images/img_2.jpg" alt="Lions"/>
            </a>
            <div class="tooltip">
            <h1>Lions</h1>
            </div>
            </li>
            
            <li id="third" class="thirdanimation">
            <a href="#">
            <img src="http://project.dimpost.com/image-slider/images/img_3.jpg" alt="Snowalker"/>
            </a>
            <div class="tooltip">
            <h1>Snowalker</h1>
            </div>
            </li>
                        
            <li id="fourth" class="fourthanimation">
            <a href="#">
            <img src="http://project.dimpost.com/image-slider/images/img_4.jpg" alt="Howling"/>
            </a>
            <div class="tooltip">
            <h1>Howling</h1>
            </div>
            </li>
                        
            <li id="fifth" class="fifthanimation">
            <a href="#">
            <img src="http://project.dimpost.com/image-slider/images/img_5.jpg" alt="Sunbathing"/>
            </a>
            <div class="tooltip">
            <h1>Sunbathing</h1>
            </div>
            </li>
            </ul>
            </div>
            <div class="progress-bar"></div>
        </div>
    </div>
</div>
4. Change the blue colored link with yours. and red colored images link with your images.
More tools Visit Googleagra

Nivo Slider - jQuery Image Slider For Blogger

Today I'm sharing another awesome, beautiful image slider for Blogger/ BlogSpot blog. It is made with jQuery. and of course HTML and CSS but the main awesomeness, sliding effect is made with jQuery. This image slider is created by dev7studios.com/nivo-slider/. They did really a great job. This slider have downloaded more than 20,00000 times from their site. I have made a bloggerized version of the slider. See demo below.


Lets Step forward to adding this jQuery Image Slider to Blogger

1. Go to Blogger Dashboard > Layout > Add a Gadget
2. Select HTML/Javascript
3. Copy the code below and paste on it.
<style type="text/css"/>
 /* dimpost.com - Basic Style */
body{
 background: transparent;
 font:15px/2 'Adobe Caslon Pro', Georgia, Serif;
 margin:0;
 padding:0;
}
a{outline:0 none}
#pagewrap{
 margin:10px auto;
 padding:0;
 position:relative;
 height:400px;
 width: 640px;
}
#slidewrap{position:absolute;}
#slider {
    border-color: #c0c0c0;
    border-radius: 5px 5px 5px 5px;
    border-style: solid;
    border-width: 10px 10px 30px;
    box-shadow: 0 0 3px #2F2F2F;
    height: 280px;
    margin: 10px;
    position: relative;
    width: 600px;
}
#slider images{
    position:absolute;
    top:0px;
    left:0px;
    display:none;
}
/* The Nivo Slider styles */
.nivoSlider {
 position:relative;
}
.nivoSlider images {
 position:absolute;
 top:0px;
 left:0px;
}
/* If an image is wrapped in a link */
.nivoSlider a.nivo-imageLink {
 position:absolute;
 top:0px;
 left:0px;
 width:100%;
 height:100%;
 border:0;
 padding:0;
 margin:0;
 z-index:6;
 display:none;
}
/* The slices and boxes in the Slider */
.nivo-slice {
 display:block;
 position:absolute;
 z-index:5;
 height:100%;
}
.nivo-box {
 display:block;
 position:absolute;
 z-index:5;
}
.nivo-directionNav{display:none!important}
.nivo-html-caption {
    display:none;
}
.nivo-caption{
 position:absolute;
 right:20px;
 text-align:center;
 top:130px;
 width:192px;
 z-index:60;
}
.nivo-caption p{margin:0}
.nivo-caption .title{font-style:italic}
.nivo-controlNav {
    bottom: -23px;
    display: block;
    height: 15px;
    left: 204px;
    position: absolute;
    text-align: center;
    width: 192px;
    z-index: 51;
 opacity: 0.6;
}
.nivo-controlNav a{
 background:transparent url(http://project.dimpost.com/image-slider/images/button.png) no-repeat center center;
 display:inline-block;
 height:14px;
 width:14px;
 text-indent:-9999px;
 cursor:pointer;
}
.nivo-controlNav .active{
 background:transparent url(http://project.dimpost.com/image-slider/images/button_active.png); 
}
 </style>
 <script src="http://project.dimpost.com/image-slider/jquery-1.6.1.min.js" type="text/javascript"></script>
 <script src="http://project.dimpost.com/image-slider/jquery.nivo.slider.pack.js" type="text/javascript"></script>
 <script type="text/javascript">
 $(window).load(function() {
  $('#slider').nivoSlider();
 });
 </script>
 <!--[if IE]>
  <script src="modernizr-2.0.min.js"></script>
 <![endif]-->   

<div id="pagewrap">
<div id="slidewrap">
 <div id="slider">
 <a href="http://dimpost.com/" target="_blank"><img alt="" title="#caption1" src="http://project.dimpost.com/image-slider/images/sample0.jpg" /></a>
 <a href="#" target="_blank"><img alt="" title="#caption2" src="http://project.dimpost.com/image-slider/images/sample1.jpg" /></a>
 <a href="#" target="_blank"><img alt="" title="#caption3" src="http://project.dimpost.com/image-slider/images/sample2.jpg" /></a>
 <a href="#" target="_blank"><img alt="" title="#caption4" src="http://project.dimpost.com/image-slider/images/sample3.jpg" /></a>
 <a href="#" target="_blank"><img alt="" title="#caption5" src="http://project.dimpost.com/image-slider/images/sample4.jpg" /></a>
 <a href="#" target="_blank"><img alt="" title="#caption6" src="http://project.dimpost.com/image-slider/images/sample5.jpg" /></a>
 </div>
</div>
</div>
4. Change the red colored link with yours. and blue colored images link with your images.

Add JavaScript Image Slider to Blogger Easily in 3steps

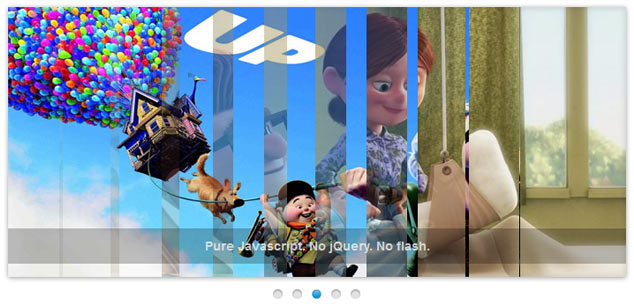
Here I’m sharing a cool JavaScript image slider for blogger. It could be easily usable as featured content on blogger blog. This image slider is created by google. A really cool slider is this. It has pretty nice sliding effect, and a less loading time as created by Javascript, no jQuery or flash used. And another thing is it’s easily customizable. I have customized it little to suite perfectly for blogger blog. See Demo or download source code from below link.

Let’s Install the Image Slider to your Blogger Blog

1. Go to Blogger Dashboard > Layout > Add a Gadget
2. Select HTML/Javascript
3. Copy the code below and paste on it.


<style type="text/css">
/* http://dimpost.com */

#sliderFrame {position:relative;width:700px;margin: 0 auto 40px;}
        
#slider {
    width:700px;height:306px;/* Make it the same size as your images */
 background:#fff url(https://blogger.googleusercontent.com/img/b/R29vZ2xl/AVvXsEi11m-UTl6v3XrRR1fD1qzNRWHAGhaWyhBzddpIkmLfWCoPbC52_YOsHdFeUHSB4vUckDMF-BLSW9dwdM2lVTwgHTgHILlvHB4yc89pbLIblhYv_Ymzgtf0ICdchTKLEQLm8_DJKc7cRoNV/s1600/loading.gif) no-repeat 50% 50%;
 position:relative;
 margin:0 auto;/*make the image slider center-aligned */
    box-shadow: 0px 1px 5px #999999;
}
#slider img {
 position:absolute;
 border:none;
 display:none;
}

/* the link style (if an image is wrapped in a link) */
#slider a.imgLink {
 z-index:2;
 display:none;position:absolute;
 top:0px;left:0px;border:0;padding:0;margin:0;
 width:100%;height:100%;
}

/* Caption styles */
div.mc-caption-bg, div.mc-caption-bg2 {
 position:absolute;
 width:100%;
 height:auto;
 padding:0;
 left:0px; 
 bottom:15px;
 z-index:3;
 overflow:hidden;
 font-size: 0;
}
div.mc-caption-bg {
 background-color:black;
}
div.mc-caption {
 font: bold 14px/20px Arial;
 color:#EEE;
 z-index:4;
 padding:10px 0;
 text-align:center;
}
div.mc-caption a {
 color:#FB0;
}
div.mc-caption a:hover {
 color:#DA0;
}


/* ------ built-in navigation bullets wrapper ------*/
div.navBulletsWrapper  {
 top:320px; left:280px; /* Its position is relative to the #slider */
 width:150px;
 background:none;
 padding-left:20px;
 position:relative;
 z-index:5;
 cursor:pointer;
}

/* each bullet */
div.navBulletsWrapper div 
{
    width:11px; height:11px;
    background:transparent url(https://blogger.googleusercontent.com/img/b/R29vZ2xl/AVvXsEiHXfPXgBK0iAvXrFgHYNDCtb3976TEjQ-9wOsWF6RqrFmvaZT5H1jQLHATorNGhe4m4Cu6_3hyx_3bXwO3eW8MIjWkKD2QbvC5t739vUhNNK35XWpbJxphb1N5oQkULLB550r6AYC68PqX/s1600/bullet.png) no-repeat 0 0;
    float:left;overflow:hidden;vertical-align:middle;cursor:pointer;
    margin-right:11px;/* distance between each bullet*/
    _position:relative;/*IE6 hack*/
}
div.navBulletsWrapper div.active {background-position:0 -11px;}
.intro {
    bottom: 0;
    color: rgba(0, 0, 0, 0.2);
    font-size: 16px;
    position: absolute;
    right: 0;
    text-decoration: none;
    z-index: 99999;
}
/* --------- Others ------- */
#slider 
{
 transform: translate3d(0,0,0);
    -ms-transform:translate3d(0,0,0);
    -moz-transform:translate3d(0,0,0);
    -o-transform:translate3d(0,0,0);
}
</style>
<script src="http://project.dimpost.com/image-slider/js-image-slider-1.js" type="text/javascript"></script>
<script src="http://project.dimpost.com/image-slider/js-image-slider-2.js" type="text/javascript"></script>

<div id="sliderFrame">
<div id="slider">
<a href="#"><img src="https://blogger.googleusercontent.com/img/b/R29vZ2xl/AVvXsEhNDP5iOShGr9OLvVJSCb7jE31ARRKzMb27hdfZudQsTLEOS-ZGNz7dARgrs4JCQbwsLJlNEN2okHbMwjHLgndQEvY8xN58a8G_7jO9OcTQU_KwyH1e4NVBu_Iuchb_BnTtK8HpRhO0Bmdw/s1600/image-slider-1.jpg" alt="#htmlcaption1" /></a>
<a href="#"><img src="https://blogger.googleusercontent.com/img/b/R29vZ2xl/AVvXsEgNsS4J44mEEkjeFa2IPPunmO_zN5XWT6l5JFMbwHwGgVvTq50Mh4HubqipPy4ZEPCeH6Bgiuc840W8N_Fxt9hxgWnTb-1jZ1lzS3wMLWF9x20hQpNgi4D-UFlLO2qoQ5gOtDCZK86yOI3V/s1600/image-slider-2.jpg" alt="Go UP!" /></a>
<a href="#"><img src="https://blogger.googleusercontent.com/img/b/R29vZ2xl/AVvXsEgpTUJfdZv2QxxqTbPm4QNZQNzi7vcT2NXHmToiEt7atz54r6VNZloJLrkbpQpcn5xPvf80uLrbOJ0c9LK8tTR6dKob2M_JGvovEnk4q_kSqAqYwD7sdIw3cW2_ULwyxKx4okeWMsyTQYZn/s1600/image-slider-3.jpg" alt="Pure Javascript. No jQuery. No flash." /></a>
<a href="#"><img src="https://blogger.googleusercontent.com/img/b/R29vZ2xl/AVvXsEhpxWzx4fLR4i3a6T-X-Fc3B5krCWDGZJBXU61y4u2OpdIn72z2sUabe5ezHugBDnNpNtEUzIDDY2YGETucHeFXQOPdLdndJlO2ZU6HIbzxa_ylyLr2pyPvm59KfHaIl8d5-zMTRHtBiJ5Z/s1600/image-slider-4.jpg" alt="#htmlcaption2" /></a>
<a href="#"><img src="https://blogger.googleusercontent.com/img/b/R29vZ2xl/AVvXsEigkDjlteyY3YszuVebe752sIyAwNQ6SbMbq-vQs_0J1vjlLZGl6HeS5p-Y0ZHf3sg6mq3zMe1TRSf0vPJ0QPNFxuPuCpHX1zugzeHGKkgqLWiiGUtR2esLa6xReI0jkrrG1SUB4ng51KKa/s1600/image-slider-5.jpg" alt="Stay Connected"/></a>
</div>
<div id="htmlcaption1" style="display: none;">
Image Slider by <a href="http://dimpost.com/" target="_blank">DIMPost.com</a>
</div>
<div id="htmlcaption2" style="display: none;">
<a href="http://www.w3schools.com/css/" target="_blank">CSS</a> <a href="http://www.w3schools.com/js/default.asp" target="_blank">JavaScript</a> Rocks.
</div>
</div>

4. Now Change the colored value of Image URL, Link to Image, Image Caption etc. as your way.